
Prompt engineering is the primary way that you, as an app developer, influence the output of generative AI models. For example, when using LLMs, you can craft prompts that influence the tone, format, length, and other characteristics of the models' responses.
The way you write these prompts will depend on the model you're using; a prompt written for one model might not perform well when used with another model. Similarly, the model parameters you set (temperature, top-k, and so on) will also affect output differently depending on the model.
Getting all three of these factors—the model, the model parameters, and the prompt—working together to produce the output you want is rarely a trivial process and often involves substantial iteration and experimentation. Genkit provides a library and file format called Dotprompt, that aims to make this iteration faster and more convenient.
Dotprompt is designed around the premise that prompts are code. You define your prompts along with the models and model parameters they're intended for separately from your application code. Then, you (or, perhaps someone not even involved with writing application code) can rapidly iterate on the prompts and model parameters using the Genkit Developer UI. Once your prompts are working the way you want, you can import them into your application and run them using Genkit.
Your prompt definitions each go in a file with a .prompt extension. Here's an
example of what these files look like:
---
model: googleai/gemini-1.5-flash
config:
  temperature: 0.9
input:
  schema:
    location: string
    style?: string
    name?: string
  default:
    location: a restaurant
---

You are the world's most welcoming AI assistant and are currently working at {{location}}.

Greet a guest{{#if name}} named {{name}}{{/if}}{{#if style}} in the style of {{style}}{{/if}}.
The portion in the triple-dashes is YAML front matter, similar to the front
matter format used by GitHub Markdown and Jekyll; the rest of the file is the
prompt, which can optionally use
Handlebars templates. The
following sections will go into more detail about each of the parts that make a
.prompt file and how to use them.
Before you begin
Before reading this page, you should be familiar with the content covered on the Generating content with AI models page.
If you want to run the code examples on this page, first complete the steps in the Getting started guide. All of the examples assume that you have already installed Genkit as a dependency in your project.
Creating prompt files
Although Dotprompt provides several different ways to create
and load prompts, it's optimized for projects that organize their prompts as
.prompt files within a single directory (or subdirectories thereof). This
section shows you how to create and load prompts using this recommended setup.
Creating a prompt directory
The Dotprompt library expects to find your prompts in a directory at your
project root and automatically loads any prompts it finds there. By default,
this directory is named prompts. For example, using the default directory
name, your project structure might look something like this:
your-project/
├── lib/
├── node_modules/
├── prompts/
│   └── hello.prompt
├── src/
├── package-lock.json
├── package.json
└── tsconfig.json
If you want to use a different directory, you can specify it when you configure Genkit:
const ai = genkit({
  promptDir: './llm_prompts',
  // (Other settings...)
});
Creating a prompt file
There are two ways to create a .prompt file: using a text editor, or with the
developer UI.
Using a text editor
If you want to create a prompt file using a text editor, create a text file with
the .prompt extension in your prompts directory: for example,
prompts/hello.prompt.
Here is a minimal example of a prompt file:
---
model: vertexai/gemini-1.5-flash
---
You are the world's most welcoming AI assistant. Greet the user and offer your assistance.
The portion in the dashes is YAML front matter, similar to the front matter format used by GitHub markdown and Jekyll; the rest of the file is the prompt, which can optionally use Handlebars templates. The front matter section is optional, but most prompt files will at least contain metadata specifying a model. The remainder of this page shows you how to go beyond this, and make use of Dotprompt's features in your prompt files.
Using the developer UI
You can also create a prompt file using the model runner in the developer UI. Start with application code that imports the Genkit library and configures it to use the model plugin you're interested in. For example:
import { genkit } from 'genkit';

// Import the model plugins you want to use.
import { googleAI } from '@genkit-ai/googleai';

const ai = genkit({
  // Initialize and configure the model plugins.
  plugins: [
    googleAI({
      apiKey: 'your-api-key', // Or (preferred): export GOOGLE_GENAI_API_KEY=...
    }),
  ],
});
It's okay if the file contains other code, but the above is all that's required.
Load the developer UI in the same project:
genkit start -- tsx --watch src/your-code.tsIn the Models section, choose the model you want to use from the list of models provided by the plugin.
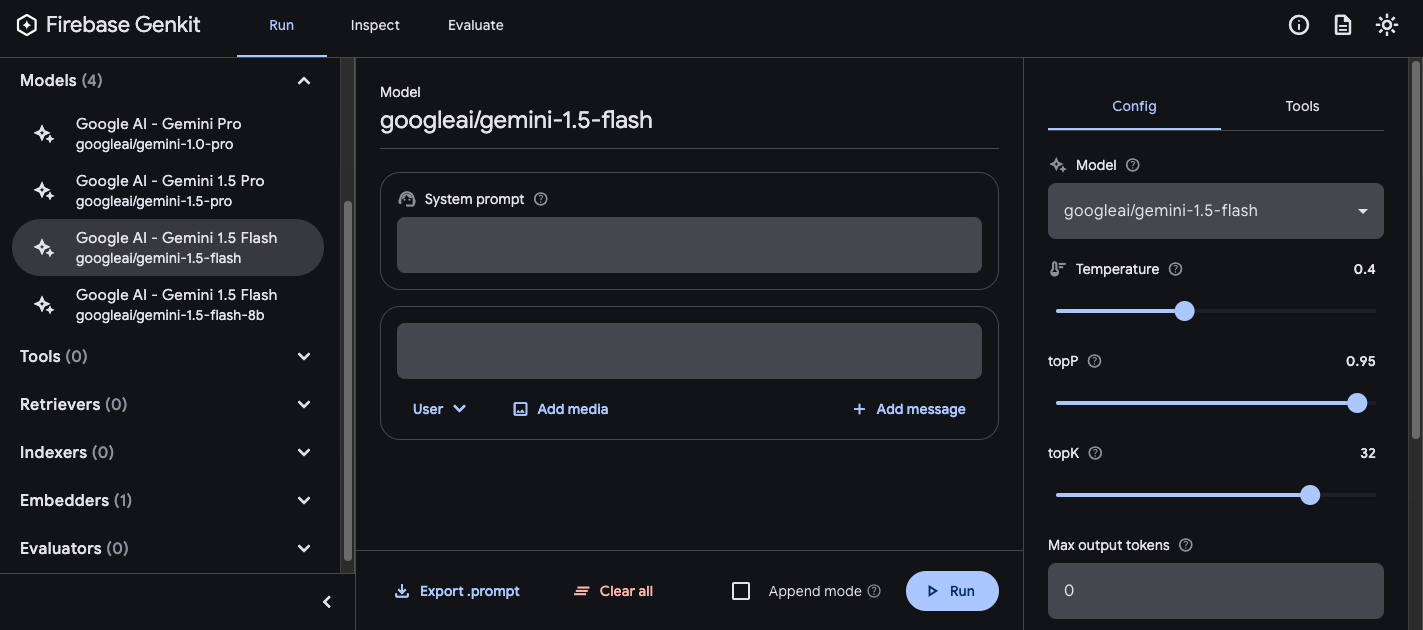
Then, experiment with the prompt and configuration until you get results you're happy with. When you're ready, press the Export button and save the file to your prompts directory.
Running prompts
After you've created prompt files, you can run them from your application code, or using the tooling provided by Genkit. Regardless of how you want to run your prompts, first start with application code that imports the Genkit library and the model plugins you're interested in. For example:
import { genkit } from 'genkit';

// Import the model plugins you want to use.
import { googleAI } from '@genkit-ai/googleai';

const ai = genkit({
  // Initialize and configure the model plugins.
  plugins: [
    googleAI({
      apiKey: 'your-api-key', // Or (preferred): export GOOGLE_GENAI_API_KEY=...
    }),
  ],
});
It's okay if the file contains other code, but the above is all that's required. If you're storing your prompts in a directory other than the default, be sure to specify it when you configure Genkit.
Run prompts from code
To use a prompt, first load it using the prompt('file_name') method:
const helloPrompt = ai.prompt('hello');
Once loaded, you can call the prompt like a function:
const response = await helloPrompt();

// Alternatively, use destructuring assignments to get only the properties
// you're interested in:
const { text } = await helloPrompt();
A callable prompt takes two optional parameters: the input to the prompt (see
the section below on specifying input schemas), and a configuration
object, similar to that of the generate() method. For example:
const response2 = await helloPrompt(
  // Prompt input:
  { name: 'Ted' },

  // Generation options:
  {
    config: {
      temperature: 0.4,
    },
  }
);
Any parameters you pass to the prompt call will override the same parameters specified in the prompt file.
See Generate content with AI models for descriptions of the available options.
Using the developer UI
As you're refining your app's prompts, you can run them in the Genkit developer UI to quickly iterate on prompts and model configurations, independently from your application code.
Load the developer UI from your project directory:
genkit start -- tsx --watch src/your-code.ts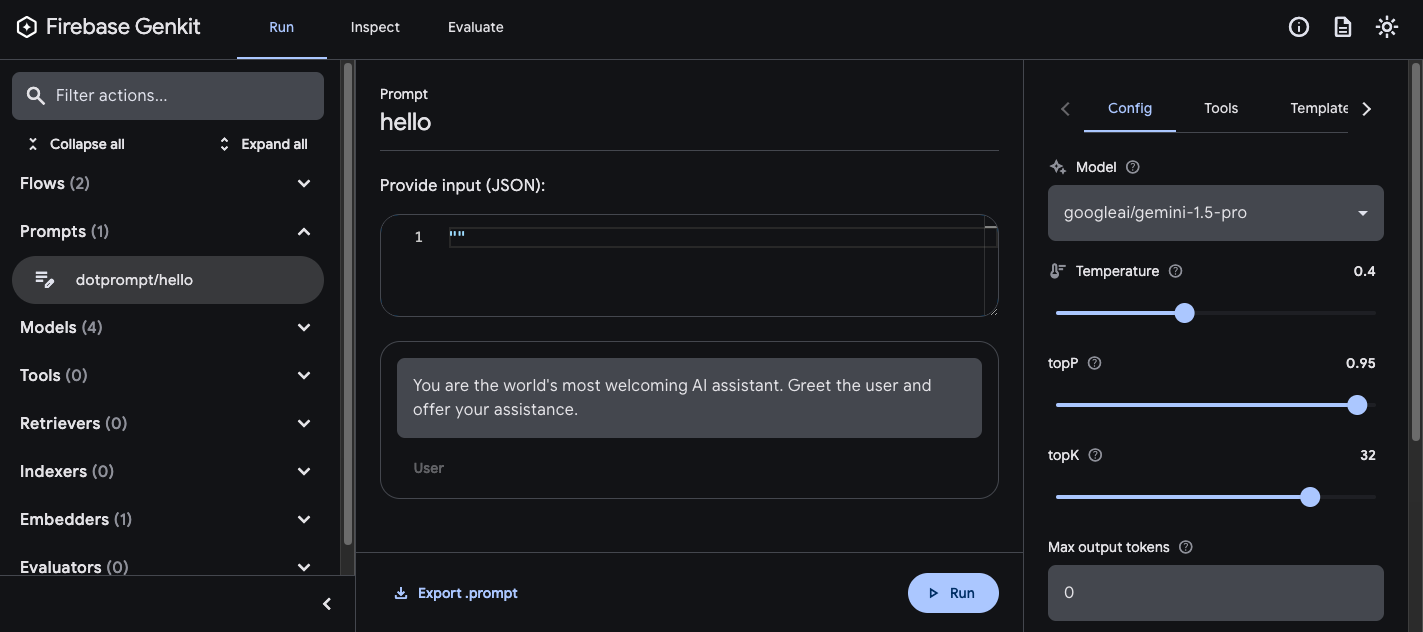
Once you've loaded prompts into the developer UI, you can run them with different input values, and experiment with how changes to the prompt wording or the configuration parameters affect the model output. When you're happy with the result, you can click the Export prompt button to save the modified prompt back into your project directory.
Model configuration
In the front matter block of your prompt files, you can optionally specify model configuration values for your prompt:
---
model: googleai/gemini-1.5-flash
config:
  temperature: 1.4
  topK: 50
  topP: 0.4
  maxOutputTokens: 400
  stopSequences:
    -   "<end>"
    -   "<fin>"
---
These values map directly to the config parameter accepted by the callable
prompt:
const response3 = await helloPrompt(
  {},
  {
    config: {
      temperature: 1.4,
      topK: 50,
      topP: 0.4,
      maxOutputTokens: 400,
      stopSequences: ['<end>', '<fin>'],
    },
  }
);
See Generate content with AI models for descriptions of the available options.
Input and output schemas
You can specify input and output schemas for your prompt by defining them in the front matter section:
---
model: googleai/gemini-1.5-flash
input:
  schema:
    theme?: string
  default:
    theme: "pirate"
output:
  schema:
    dishname: string
    description: string
    calories: integer
    allergens(array): string
---
Invent a menu item for a {{theme}} themed restaurant.
These schemas are used in much the same way as those passed to a generate()
request or a flow definition. For example, the prompt defined above produces
structured output:
const menuPrompt = ai.prompt('menu');
const { data } = await menuPrompt({ theme: 'medieval' });

const dishName = data['dishname'];
const description = data['description'];
You have several options for defining schemas in a .prompt file: Dotprompt's
own schema definition format, Picoschema; standard JSON Schema; or, as
references to schemas defined in your application code. The following sections
describe each of these options in more detail.
Picoschema
The schemas in the example above are defined in a format called Picoschema. Picoschema is a compact, YAML-optimized schema definition format that makes it easy to define the most important attributes of a schema for LLM usage. Here's a longer example of a schema, which specifies the information an app might store about an article:
schema:
  title: string # string, number, and boolean types are defined like this
  subtitle?: string # optional fields are marked with a `?`
  draft?: boolean, true when in draft state
  status?(enum, approval status): [PENDING, APPROVED]
  date: string, the date of publication e.g. '2024-04-09' # descriptions follow a comma
  tags(array, relevant tags for article): string # arrays are denoted via parentheses
  authors(array):
    name: string
    email?: string
  metadata?(object): # objects are also denoted via parentheses
    updatedAt?: string, ISO timestamp of last update
    approvedBy?: integer, id of approver
  extra?: any, arbitrary extra data
  (*): string, wildcard field
The above schema is equivalent to the following TypeScript interface:
interface Article {
  title: string;
  subtitle?: string | null;
  /** true when in draft state */
  draft?: boolean | null;
  /** approval status */
  status?: 'PENDING' | 'APPROVED' | null;
  /** the date of publication e.g. '2024-04-09' */
  date: string;
  /** relevant tags for article */
  tags: string[];
  authors: {
    name: string;
    email?: string | null;
  }[];
  metadata?: {
    /** ISO timestamp of last update */
    updatedAt?: string | null;
    /** id of approver */
    approvedBy?: number | null;
  } | null;
  /** arbitrary extra data */
  extra?: any;
  /** wildcard field */

}
Picoschema supports scalar types string, integer, number, boolean, and
any. Objects, arrays, and enums are denoted by a parenthetical after the field
name.
Objects defined by Picoschema have all properties required unless denoted
optional by ?, and do not allow additional properties. When a property is
marked as optional, it is also made nullable to provide more leniency for LLMs
to return null instead of omitting a field.
In an object definition, the special key (*) can be used to declare a
"wildcard" field definition. This will match any additional properties not
supplied by an explicit key.
JSON Schema
Picoschema does not support many of the capabilities of full JSON schema. If you require more robust schemas, you may supply a JSON Schema instead:
output:
  schema:
    type: object
    properties:
      field1:
        type: number
        minimum: 20
Zod schemas defined in code
In addition to directly defining schemas in the .prompt file, you can
reference a schema registered with defineSchema() by name. If you're using
TypeScript, this approach will let you take advantage of the language's static
type checking features when you work with prompts.
To register a schema:
import { z } from 'genkit';

const MenuItemSchema = ai.defineSchema(
  'MenuItemSchema',
  z.object({
    dishname: z.string(),
    description: z.string(),
    calories: z.coerce.number(),
    allergens: z.array(z.string()),
  })
);
Within your prompt, provide the name of the registered schema:
---
model: googleai/gemini-1.5-flash-latest
output:
  schema: MenuItemSchema
---
The Dotprompt library will automatically resolve the name to the underlying registered Zod schema. You can then utilize the schema to strongly type the output of a Dotprompt:
const menuPrompt = ai.prompt<
  z.ZodTypeAny, // Input schema
  typeof MenuItemSchema, // Output schema
  z.ZodTypeAny // Custom options schema
>('menu');
const { data } = await menuPrompt({ theme: 'medieval' });

// Now data is strongly typed as MenuItemSchema:
const dishName = data?.dishname;
const description = data?.description;
Prompt templates
The portion of a .prompt file that follows the front matter (if present) is
the prompt itself, which will be passed to the model. While this prompt could be
a simple text string, very often you will want to incorporate user input into
the prompt. To do so, you can specify your prompt using the
Handlebars templating language.
Prompt templates can include placeholders that refer to the values defined by
your prompt's input schema.
You already saw this in action in the section on input and output schemas:
---
model: googleai/gemini-1.5-flash
config:
  temperature: 1.4
  topK: 50
  topP: 0.4
  maxOutputTokens: 400
  stopSequences:
    -   "<end>"
    -   "<fin>"
---
In this example, the Handlebars expression, {{theme}},
resolves to the value of the input's theme property when you run the
prompt. To pass input to the prompt, call the prompt as in the following
example:
const menuPrompt = ai.prompt('menu');
const { data } = await menuPrompt({ theme: 'medieval' });
Note that because the input schema declared the theme property to be optional
and provided a default, you could have omitted the property,
and the prompt would have resolved using the default value.
Handlebars templates also support some limited logical constructs. For example,
as an alternative to providing a default, you could define the prompt using
Handlebars's #if helper:
---
model: googleai/gemini-1.5-flash
input:
  schema:
    theme?: string
---
Invent a menu item for a {{#if theme}}{{theme}} themed{{/if}} restaurant.
In this example, the prompt renders as "Invent a menu item for a restaurant"
when the theme property is unspecified.
See the Handlebars documentation for information on all of the built-in logical helpers.
In addition to properties defined by your input schema, your templates can also refer to values automatically defined by Genkit. The next few sections describe these automatically-defined values and how you can use them.
Multi-message prompts
By default, Dotprompt constructs a single message with a "user" role. However, some prompts are best expressed as a combination of multiple messages, such as a system prompt.
The {{role}} helper provides a simple way to
construct multi-message prompts:
---
model: vertexai/gemini-1.5-flash
input:
  schema:
    userQuestion: string
---
{{role "system"}}
You are a helpful AI assistant that really loves to talk about food. Try to work
food items into all of your conversations.
{{role "user"}}
{{userQuestion}}
Multi-modal prompts
For models that support multimodal input, such as images alongside text, you can
use the {{media}} helper:
---
model: vertexai/gemini-1.5-flash
input:
  schema:
    photoUrl: string
---
Describe this image in a detailed paragraph:

{{media url=photoUrl}}
The URL can be https: or base64-encoded data: URIs for "inline" image usage.
In code, this would be:
const multimodalPrompt = ai.prompt('multimodal');
const { text } = await multimodalPrompt({
  photoUrl: 'https://example.com/photo.jpg',
});
See also Multimodal input, on the Models
page, for an example of constructing a data: URL.
Partials
Partials are reusable templates that can be included inside any prompt. Partials can be especially helpful for related prompts that share common behavior.
When loading a prompt directory, any file prefixed with an underscore (_) is
considered a partial. So a file _personality.prompt might contain:
You should speak like a {{#if style}}{{style}}{{else}}helpful assistant.{{/else}}.
This can then be included in other prompts:
---
model: googleai/gemini-1.5-flash
input:
  schema:
    name: string
    style?: string
---
{{ role "system" }}
{{>personality style=style}}

{{ role "user" }}
Give the user a friendly greeting.

User's Name: {{name}}
Partials are inserted using the
{{>NAME_OF_PARTIAL args...}}
syntax. If no arguments are provided to the partial, it executes with the same
context as the parent prompt.
Partials accept both named arguments as above or a single positional argument representing the context. This can be helpful for tasks such as rendering members of a list.
_destination.prompt
- {{name}} ({{country}})
chooseDestination.prompt
---
model: googleai/gemini-1.5-flash-latest
input:
  schema:
    destinations(array):
      name: string
      country: string
---
Help the user decide between these vacation destinations:

{{#each destinations}}
{{>destination this}}
{{/each}}
Defining partials in code
You can also define partials in code using definePartial:
ai.definePartial(
  'personality',
  'Talk like a {{#if style}}{{style}}{{else}}helpful assistant{{/if}}.'
);
Code-defined partials are available in all prompts.
Defining Custom Helpers
You can define custom helpers to process and manage data inside of a prompt.
Helpers are registered globally using defineHelper:
ai.defineHelper('shout', (text: string) => text.toUpperCase());
Once a helper is defined you can use it in any prompt:
---
model: googleai/gemini-1.5-flash
input:
  schema:
    name: string
---

HELLO, {{shout name}}!!!
Prompt variants
Because prompt files are just text, you can (and should!) commit them to your version control system, allowing you to compare changes over time easily. Often, tweaked versions of prompts can only be fully tested in a production environment side-by-side with existing versions. Dotprompt supports this through its variants feature.
To create a variant, create a [name].[variant].prompt file. For instance, if
you were using Gemini 1.5 Flash in your prompt but wanted to see if Gemini 1.5
Pro would perform better, you might create two files:
my_prompt.prompt: the "baseline" promptmy_prompt.gemini15pro.prompt: a variant namedgemini15pro
To use a prompt variant, specify the variant option when loading:
const myPrompt = ai.prompt('my_prompt', { variant: 'gemini15pro' });
The name of the variant is included in the metadata of generation traces, so you can compare and contrast actual performance between variants in the Genkit trace inspector.
Defining prompts in code
All of the examples discussed so far have assumed that your prompts are defined
in individual .prompt files in a single directory (or subdirectories thereof),
accessible to your app at runtime. Dotprompt is designed around this setup, and
its authors consider it to be the best developer experience overall.
However, if you have use cases that are not well supported by this setup,
you can also define prompts in code using the definePrompt() function:
The first parameter to this function is analogous to the front matter block of a
.prompt file; the second parameter can either be a Handlebars template string,
as in a prompt file, or a function that returns a GenerateRequest:
const myPrompt = ai.definePrompt(
  {
    name: 'myPrompt',
    model: 'googleai/gemini-1.5-flash',
    input: {
      schema: z.object({
        name: z.string(),
      }),
    },
  },
  'Hello, {{name}}. How are you today?'
);
const myPrompt = ai.definePrompt(
  {
    name: 'myPrompt',
    model: 'googleai/gemini-1.5-flash',
    input: {
      schema: z.object({
        name: z.string(),
      }),
    },
  },
  async (input): Promise<GenerateRequest> => {
    return {
      messages: [
        {
          role: 'user',
          content: [{ text: `Hello, ${input.name}. How are you today?` }],
        },
      ],
    };
  }
);